
さくらVPS Ubuntu Redmine5+Apache2.4 の環境において、Gitの新規リポジトリの作成方法を備忘録として書きます。
Redmine5.0 + Apache2.4 + Git の連携方法は↓の記事を参考にしてください。
あわせて読みたい


【Ubuntu】Redmine5.0、Apache2.4 をGitと連携する
さくらVPS Ubuntu で、Redmine5.0 とApache2.4をGitと連携する方法を備忘録として書きます。 やりたいこと Redmine5.0 からGitリポジトリにアクセスする https:// ~、…
設定環境
- さくらVPS
- Ubuntu22.04
- Apache2.4.52
- Let’s Encript
- Ruby3.1.3
- RubyOnRails6.1.7.2
- Passenger6.0.17
- MySQL5.7.41
- Git2.34.1
目次
Gitリポジトリの作成
サーバー上にテスト用のGitリポジトリを作成します。
$ cd /var/www/git
$ sudo mkdir test.git
$ cd test.git
$ sudo git init --bare
$ sudo git update-server-info
$ cd ../
$ sudo chown -R www-data:www-data test.git
Gitリポジトリはこれで作成完了です。
Redmineの設定
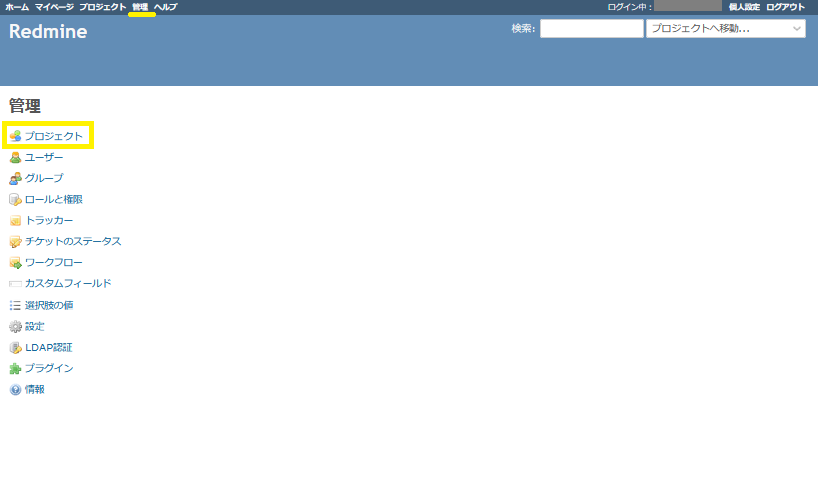
管理ユーザーでRedmineにログインします。ログイン後、管理画面に移動し、プロジェクトボタンを押します。
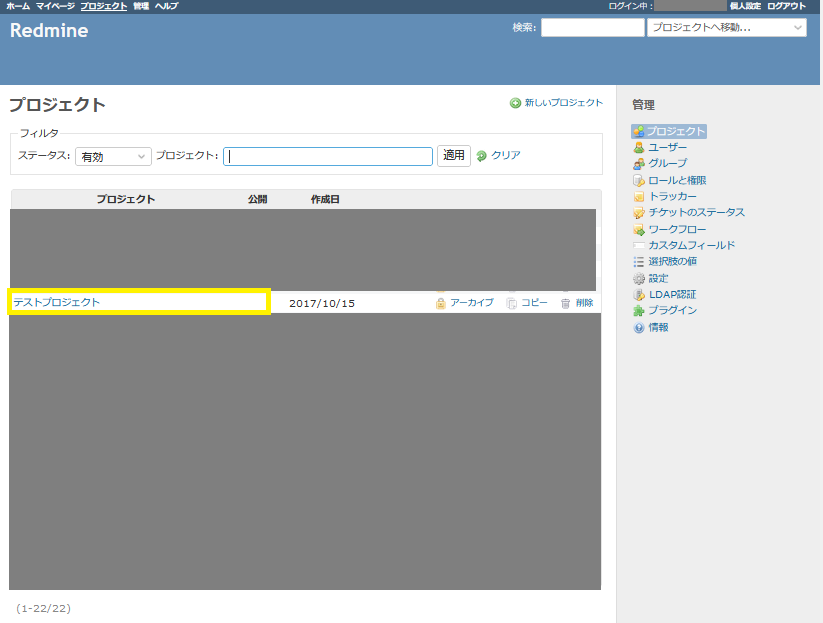
テストプロジェクトの設定画面からリポジトリを選択します。
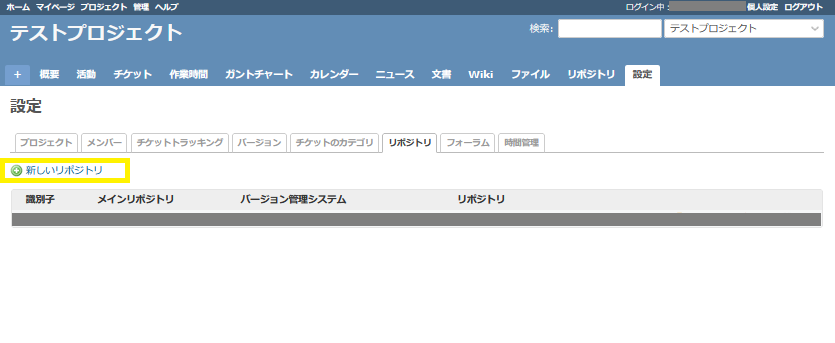
リポジトリタブで、新しいリポジトリボタンを押します。
設定画面が表示されます。
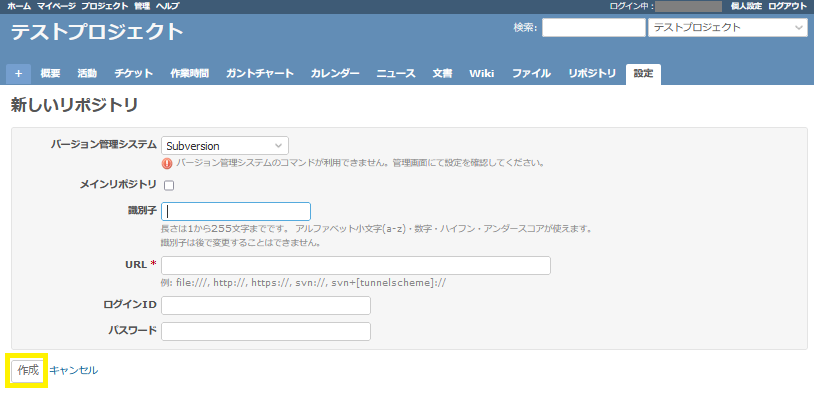
以下のように設定します。設定完了後、作成ボタンを押します。
| バージョン管理システム | Git |
| メインリポジトリ | メインにするならチェック |
| 識別子 | 任意 |
| URL | /var/www/git/test.git |
| パスエンコーディング | ブランク |
| ファイルとディレクトリの最新コミットを表示する | チェック |
リポジトリが作成できました。


コメント