ローカルPCのApache + PHP の環境で、Visual Studio Code を使用してデバッグを行う方法を備忘録として書きます。
XDebugとVisual Studio Code のプラグインであるPHP Debugを使用します。
ブレークポイントでプログラムを停止するところまでをやっていきます。
- Windows10 Home 64bit
- Apache2.4.55
- PHP8.0.27
- Visual Studio Code 1.76.2
XDebug のインストール
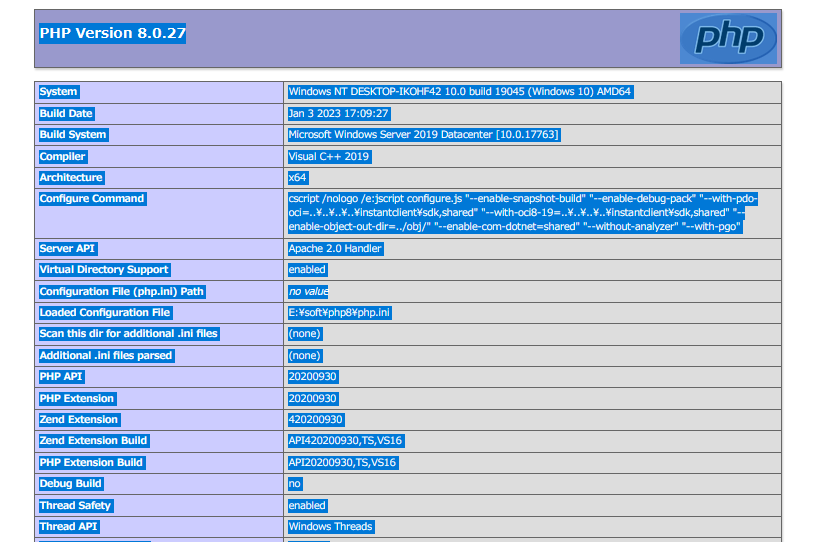
phpinfoの表示
インストールするためには、phpinfoの情報が必要となります。ローカルPCからブラウザでphpinfoを表示させます。表示させる方法については↓の記事を参考にしてください。
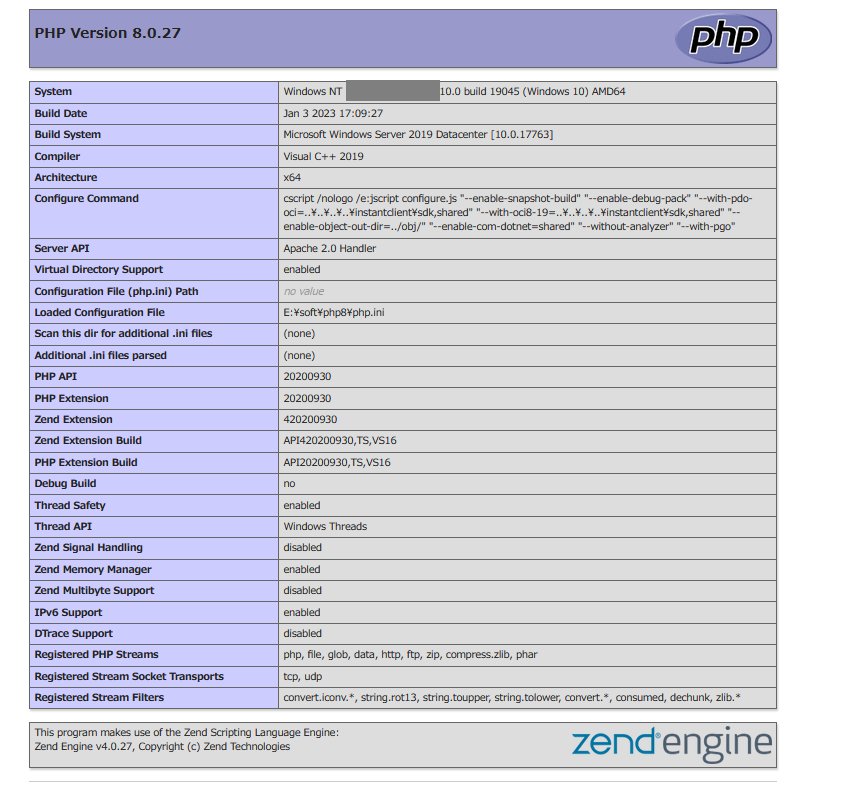
phpinfoの内容は、後から必要になります。
XDebugのインストール方法
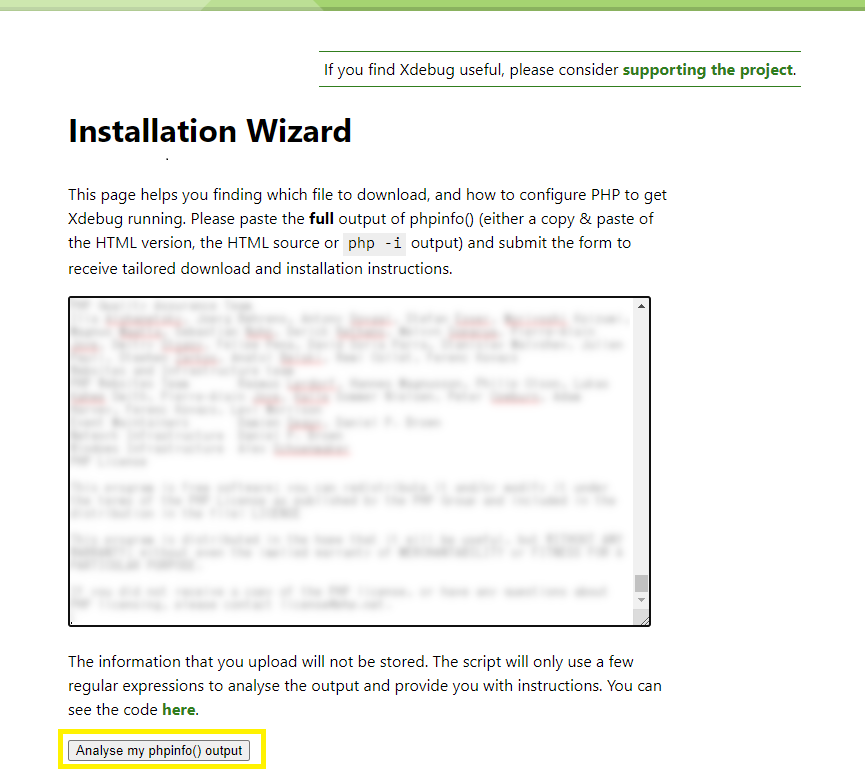
ブラウザでこちらのURLにアクセスします。
↓の黄色枠に、phpinfoの表示内容をコピペします。
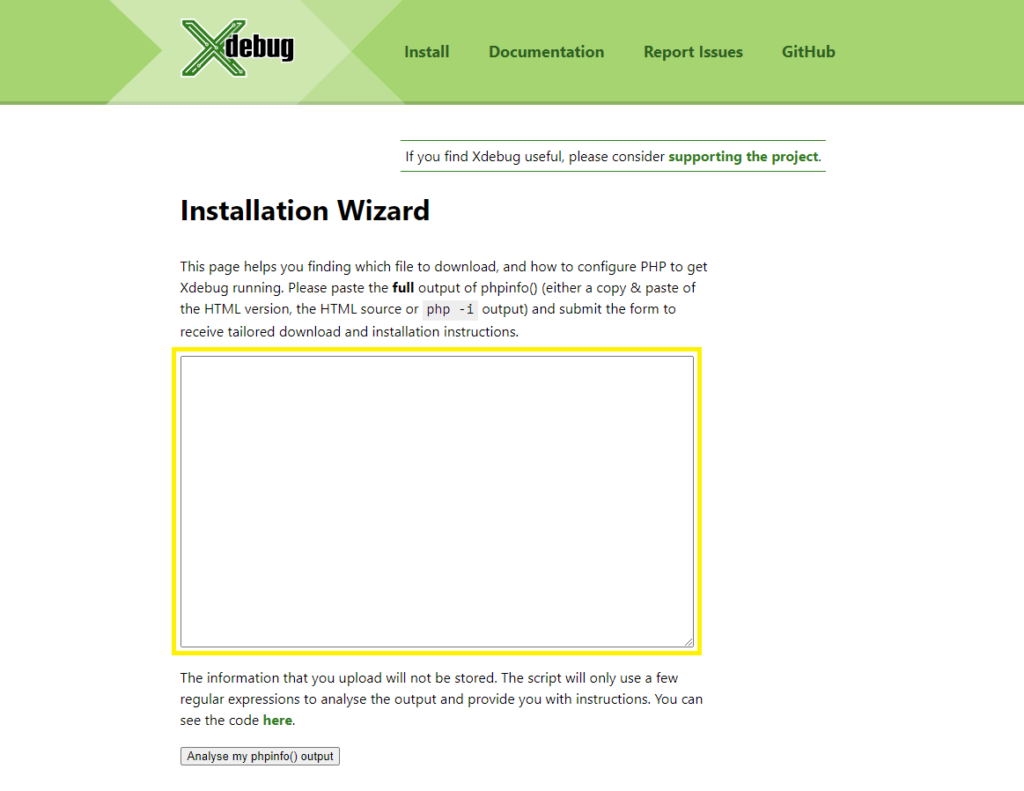
phpinfoの内容を貼り付けた後に、Analyse my phpinfo() output を押します。
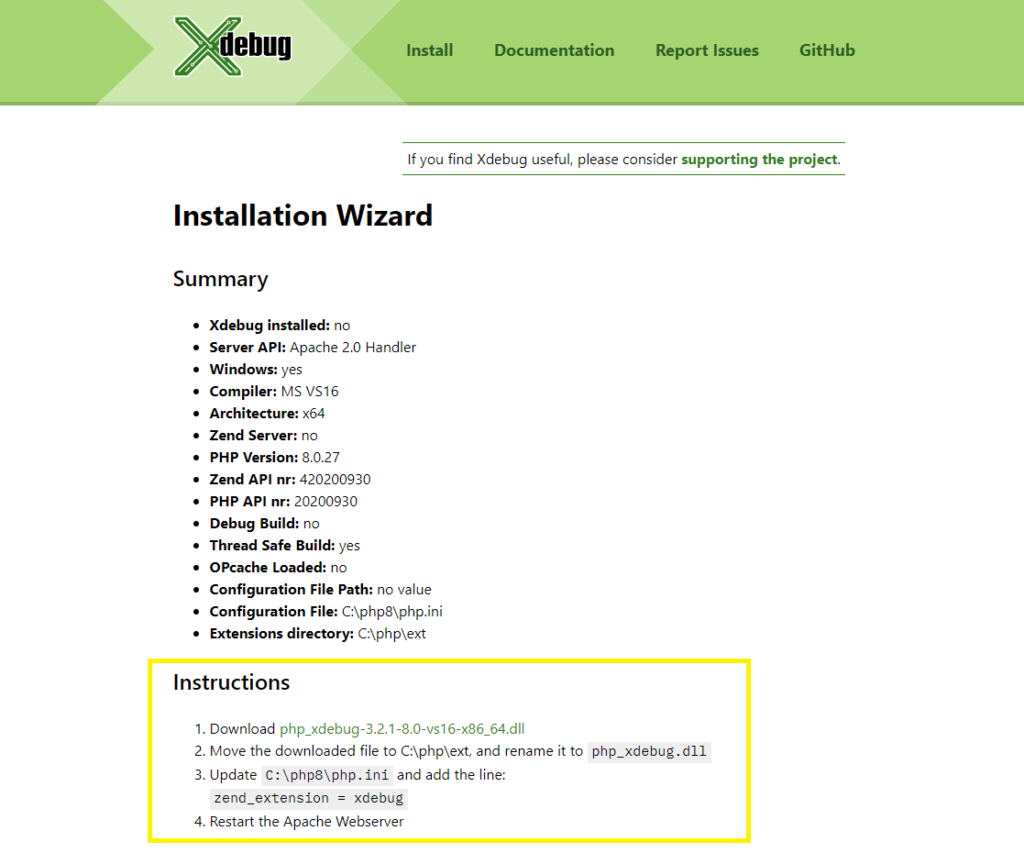
↓の内容が表示されました。この内容を参考に、インストールを行います。
php_xdebugのインストール
Instructions に表示されている通り、以下を行います。
- php_xdebug-3.2.1-8.0-vs16-x86_64.dllをダウンロードします。
- ダウンロードしたファイルを、(phpのインストールフォルダ)\extに移動します。
- php_xdebug.dll に名前を変えます。
php.ini に以下の内容を追記します。Instructions と違う内容となってます。
[XDebug 3.X.X]
xdebug.mode=debug
xdebug.start_with_request=yes
zend_extension = "(php_xdebug.dllのパス)"
Apacheを再起動して、インストール完了です。
PHP Debug プラグインのインストール
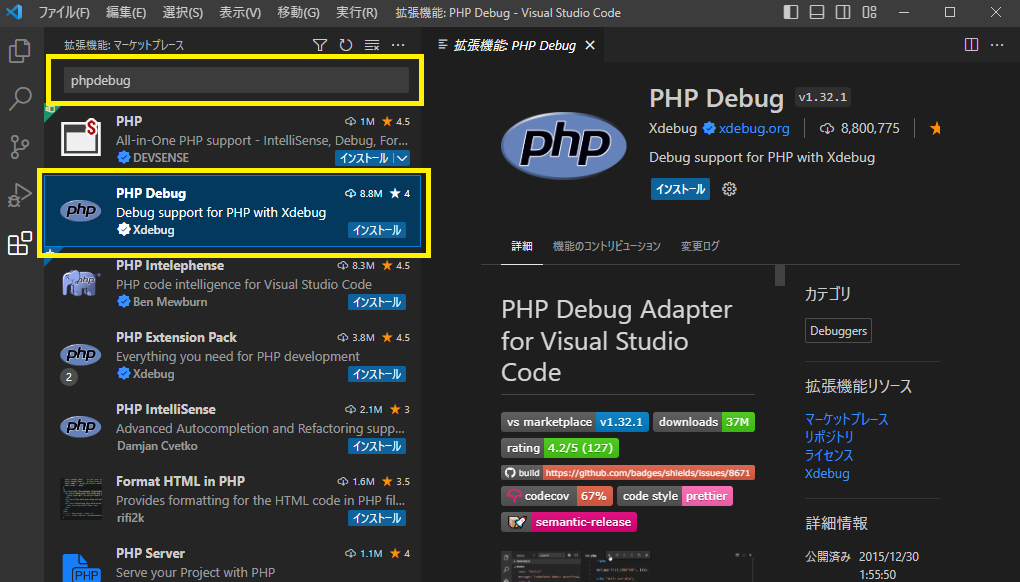
Visual Studio Code を起動し、拡張機能を選択します。

phpdebug と入力し、PHPDebugを選択します。
しばらく待つとインストールが完了します。
PHP のデバッグ
先ほど表示したphpinfo のコードでブレークポイントを設定し、デバッグしてみます。
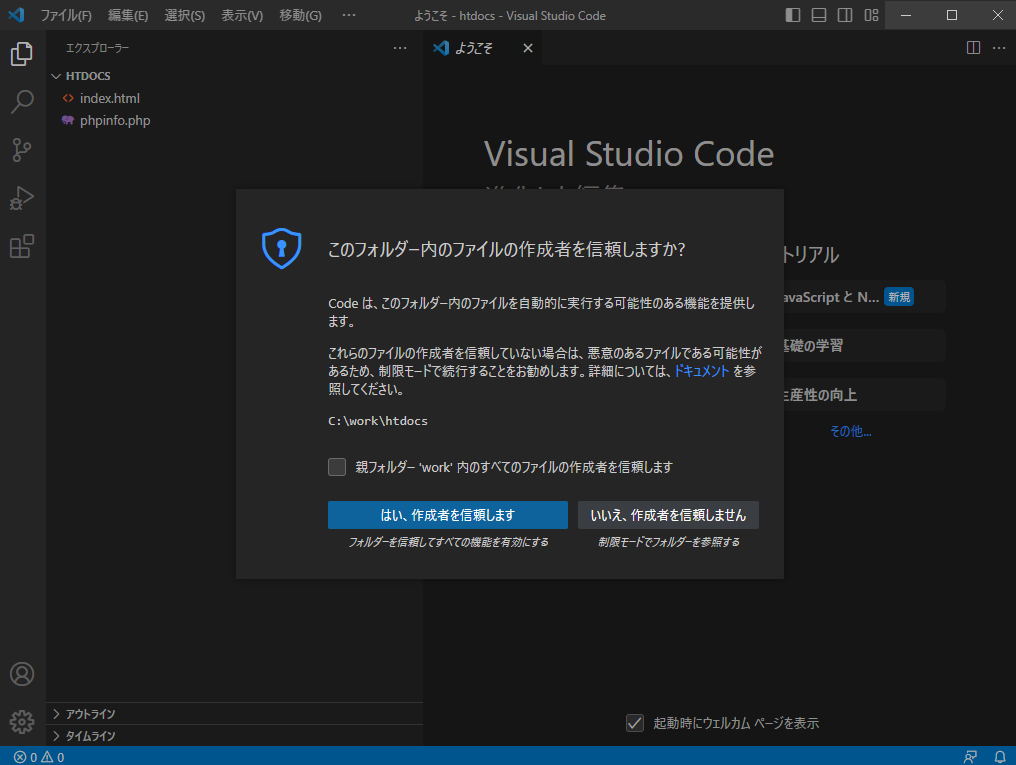
Visual Sdudio Codeを起動し、apacheのデータフォルダを開きます。
データフォルダは、apache フォルダのhtdocsフォルダとなります。
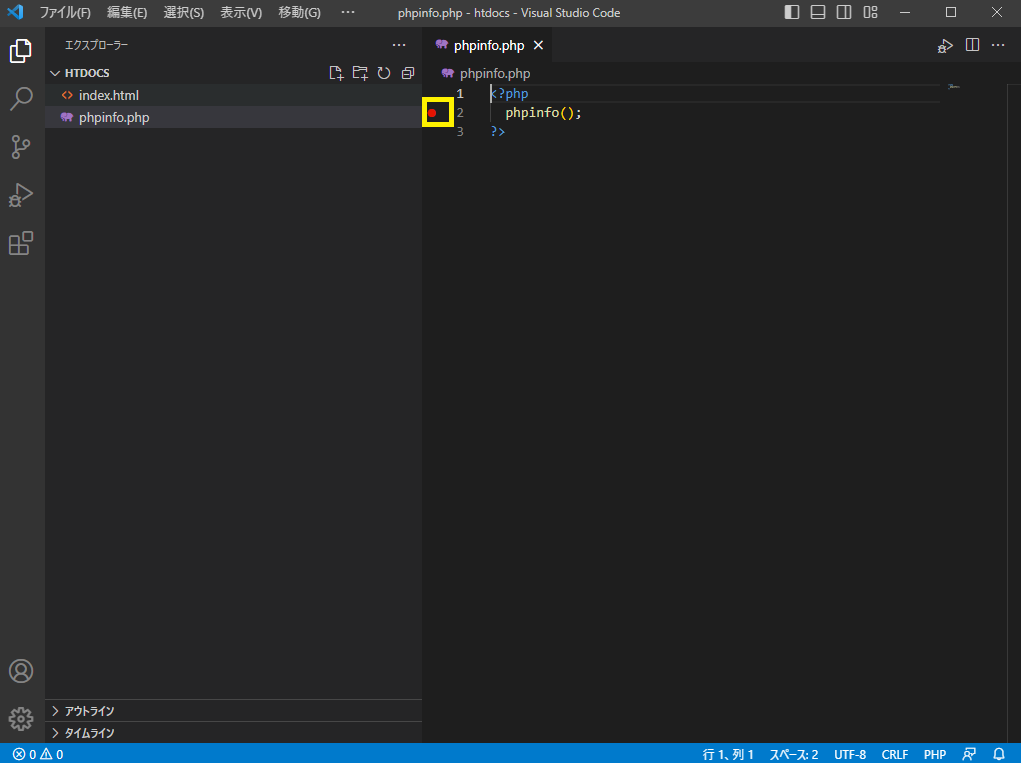
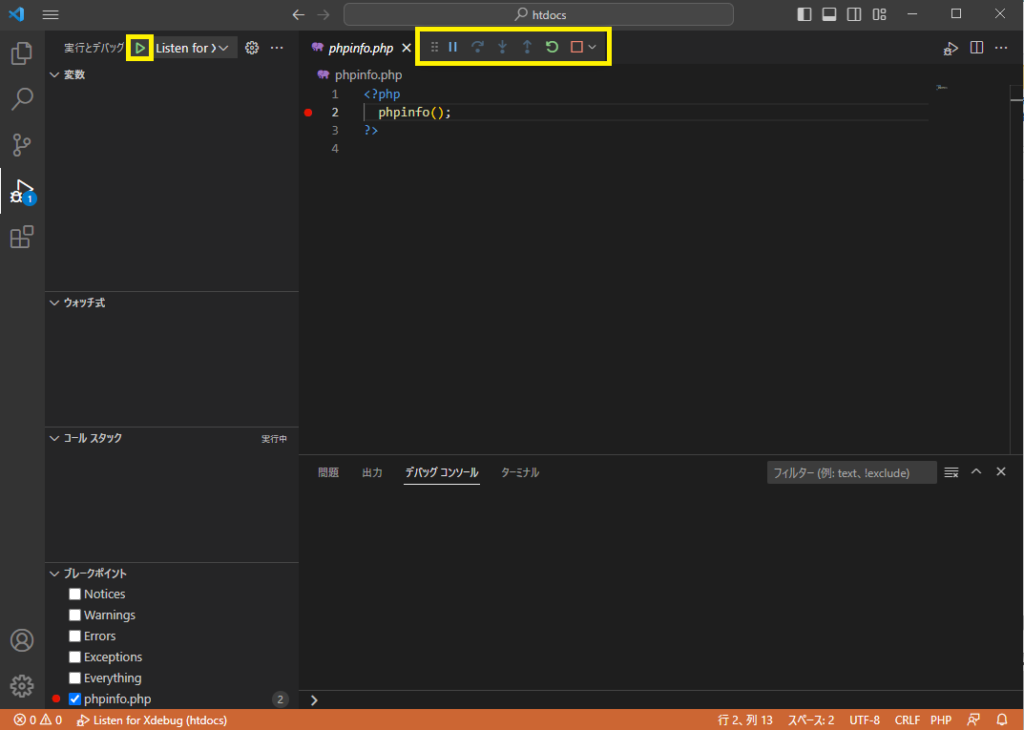
phpinfo.php を開き、2行目にブレークポイントを設定します。
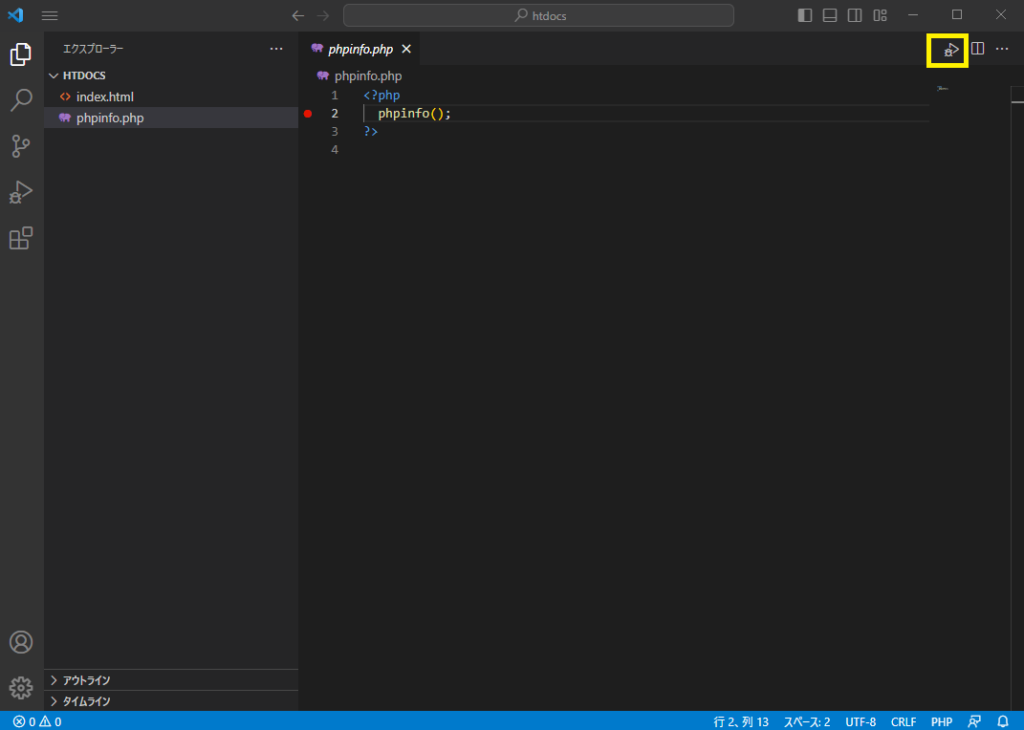
右上のデバッグのマークをクリックします。
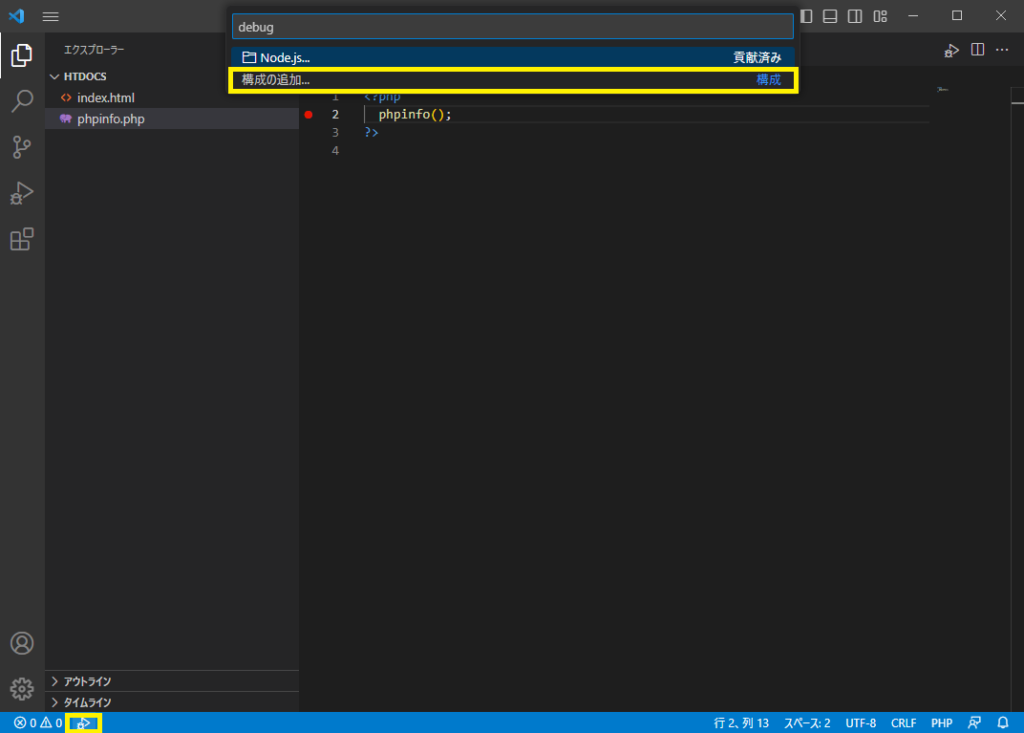
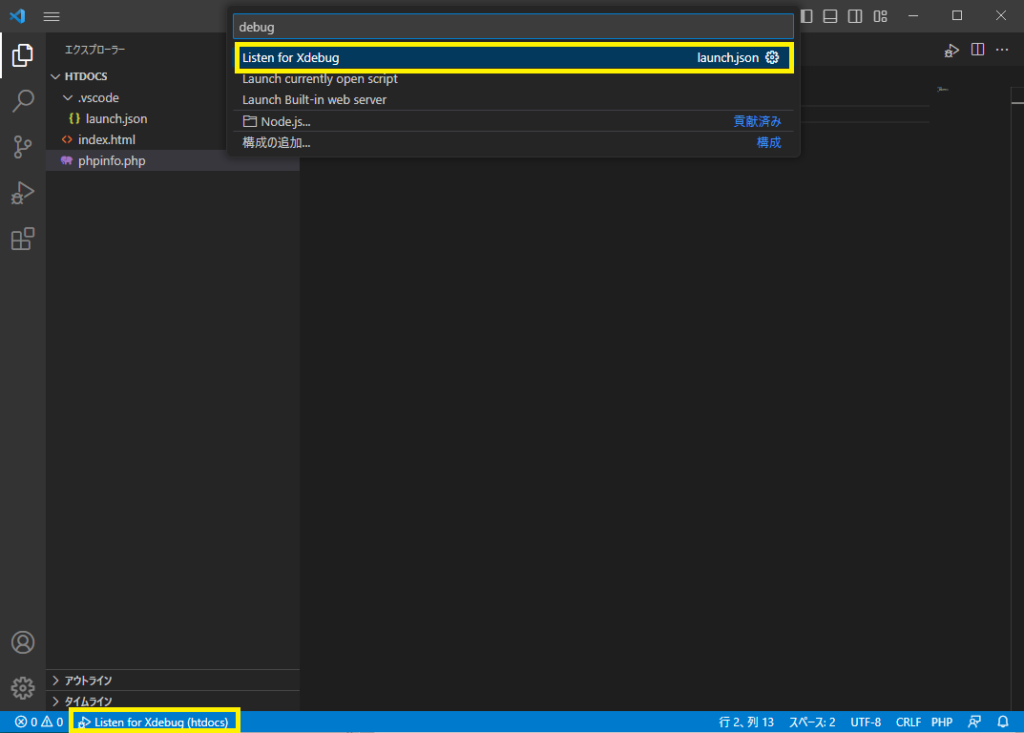
画面の左下にデバッグマークがでてくるのでクリックします。そのあと、構成の追加を押します。
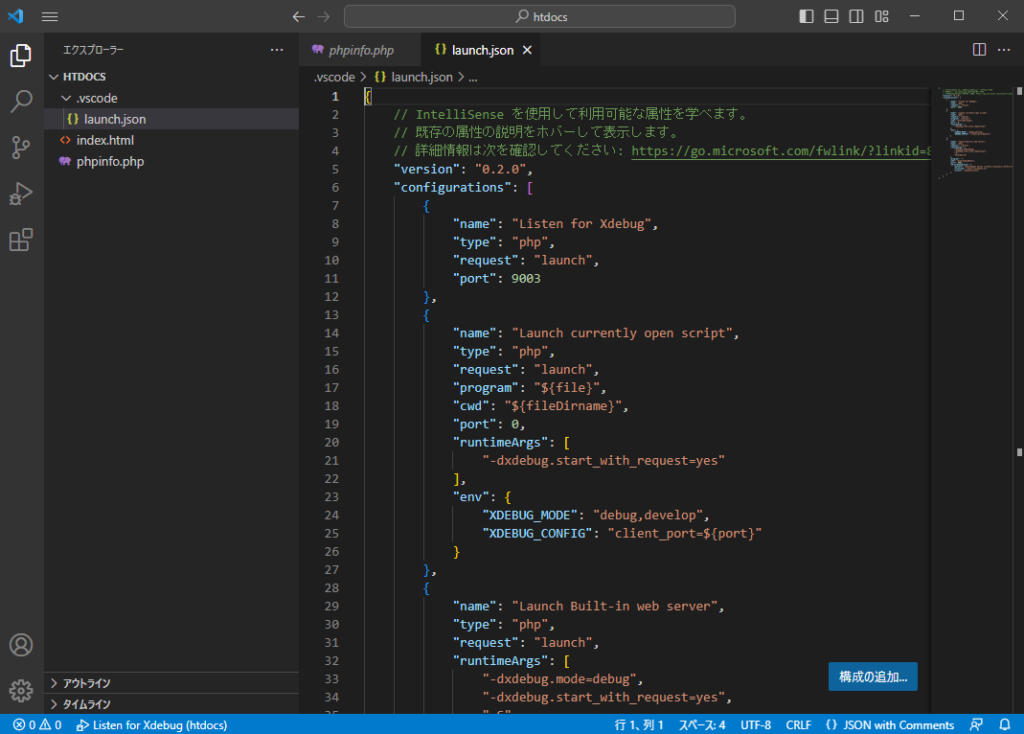
launch.jsonが開かれます。Xdebug の設定が開かれます。追加設定することはないので、そのまま閉じます。
- 右下のListen for Xdebug(htdocs) を押します。
- 中央上のListen for Xdebugを選択します。
左側の実行ボタンを押します。デバッグモードが開始します。
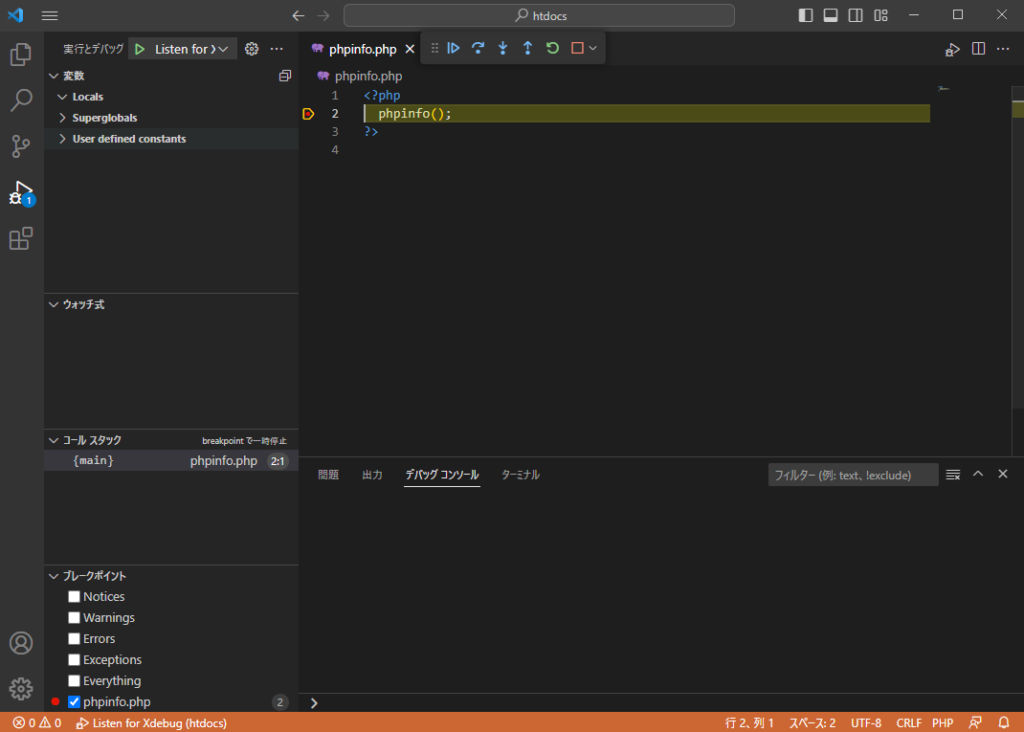
ブラウザから、http;//localhost/phpinfo.php にアクセスします。アクセスすると↓の画面のように、phpinfo()でプログラムを停止することができました。
ウォッチ式で変数を見たり、コーススタックも見たりできそうです。


コメント